
Starting State
Use the vizij-web workspace root:
cd /home/chris/Code/Semio/vizij_ws/vizij-web
pnpm run dev:vizij-authoring
Open the local URL shown by Vite.
This walkthrough uses the preset-based path because it removes import and rigging uncertainty from the first customization success.
What You Should See Before Loading Anything
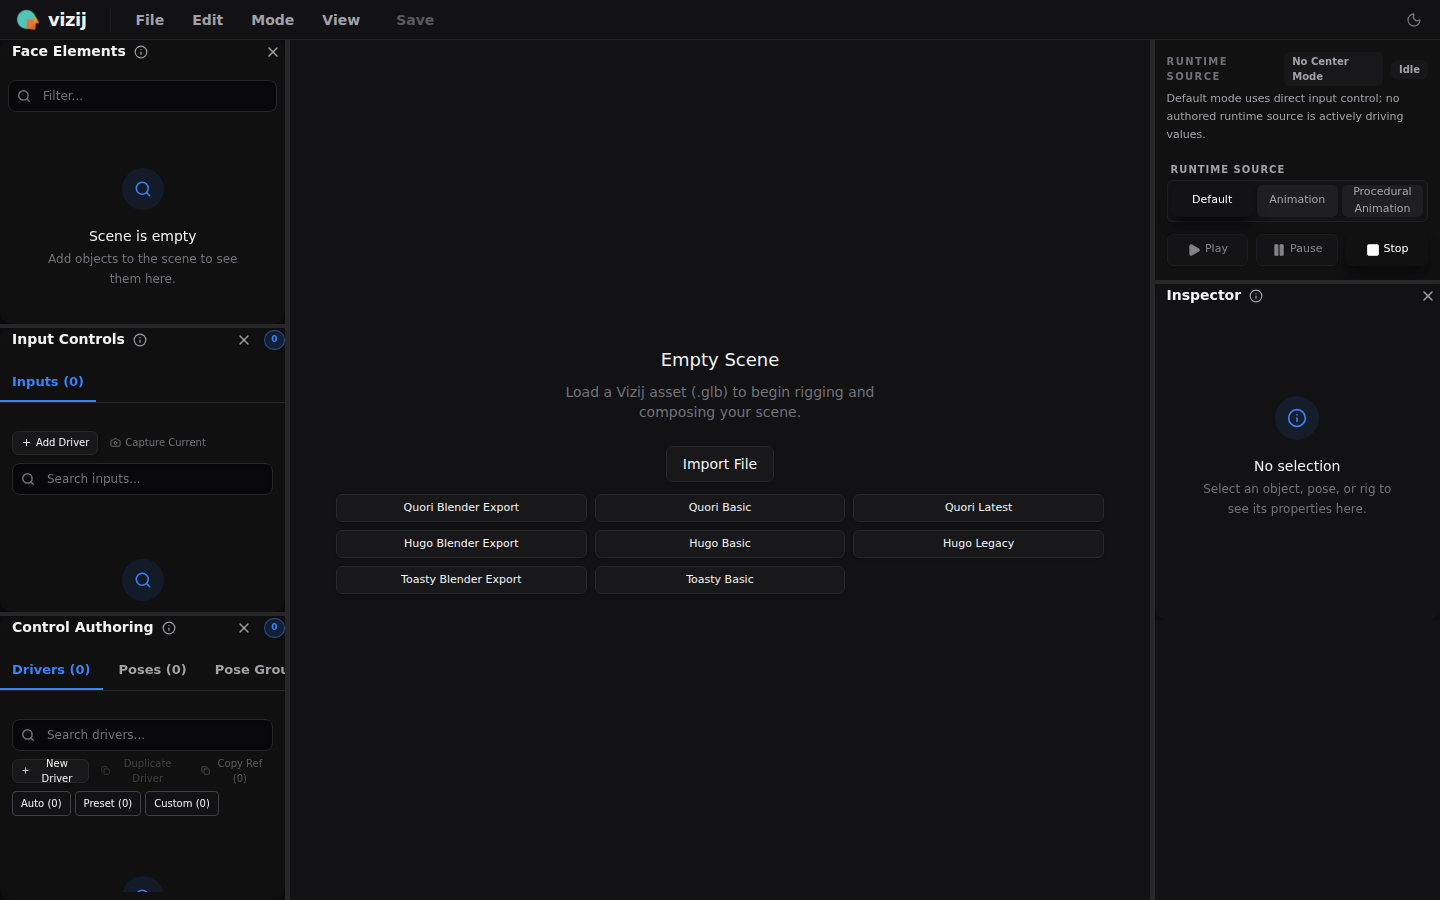
The authoring app starts in an empty-scene state with preset buttons in the center of the screen.
Current visual anchor:
Expected result before you continue:
- the main canvas says
Empty Scene - preset buttons such as
Quori Latestare visible - the side panels are present even though no face is loaded yet
Walkthrough
1. Load a maintained preset face
Click Quori Latest.
You are intentionally starting with a known-good preset because this page is about editing an existing face, not about debugging import.
Expected result:
- the loader leaves the empty-scene state
- the face appears in the main preview
- the
Face Elementspanel populates with scene objects - the authoring panels stop looking empty
If the preset never finishes loading, use Validation Checkpoints or Troubleshooting Matrix before trying to edit anything.
2. Find one editable surface in the loaded face
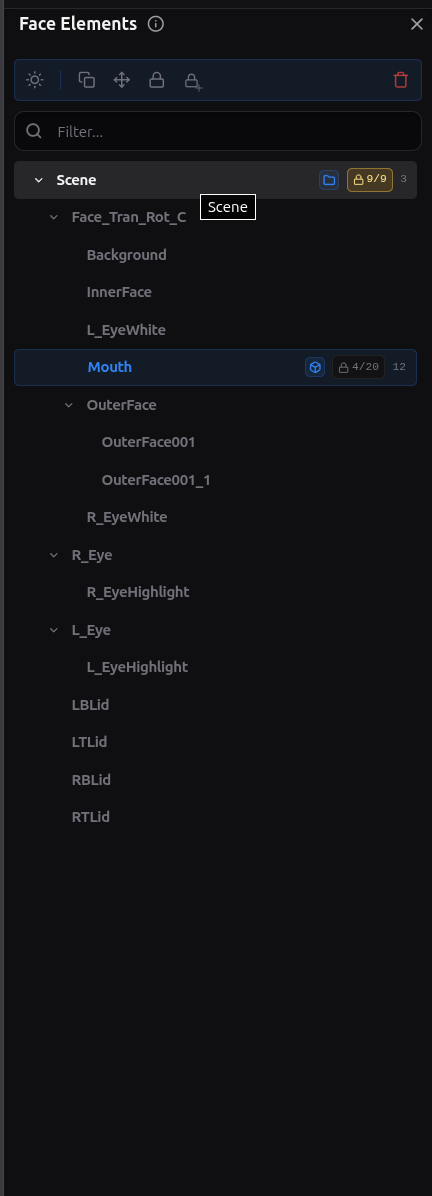
In the left Face Elements panel, expand the scene tree and select Mouth or another obvious facial element.
Useful visual anchors:
Motion anchors:
These short loops show the exact move you are trying to learn here: pick a real scene element on the left, watch the selection settle, then use the inspector on the right as the authoring surface that turns a loaded face into an editable one.
Expected result:
- the selected element is highlighted in the scene tree
- the
Inspectorpanel on the right fills with properties for that element - you can now see the difference between loading a face and editing a face
3. Make one small visible change
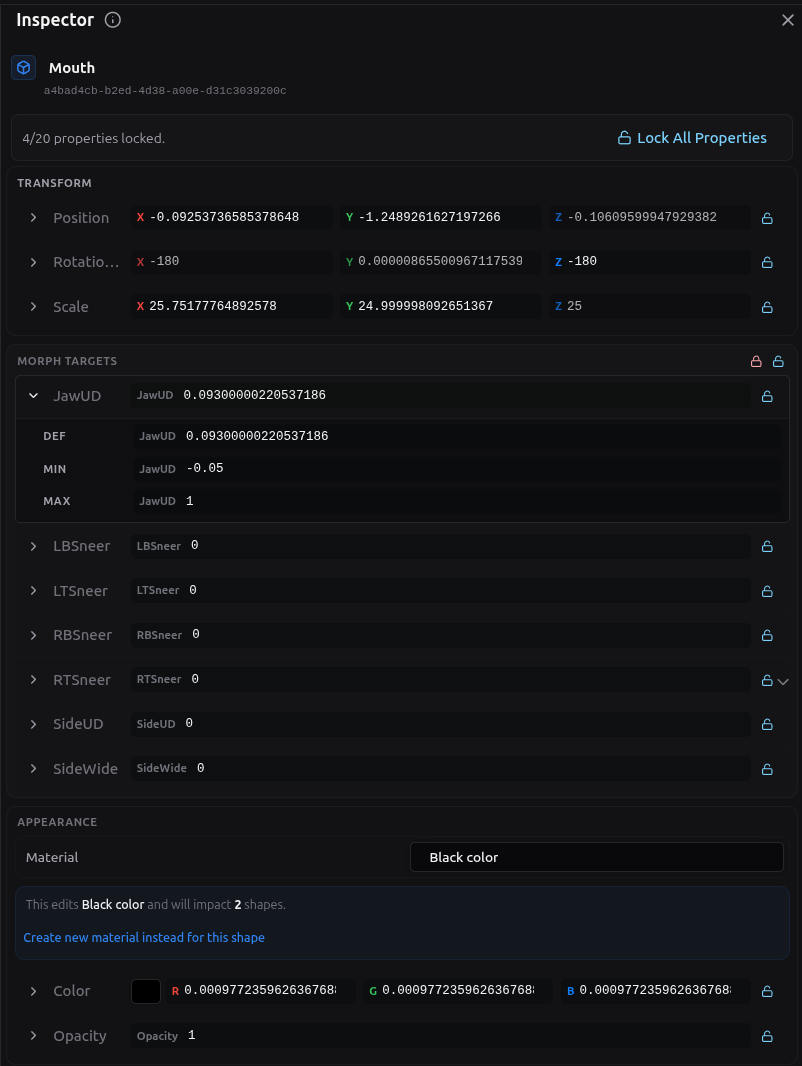
Inside the Inspector, adjust one existing property on the selected element.
Good first choices:
- a mouth-related morph target such as
JawUD - another unlocked facial morph target on the selected element
- a small transform value if that is the clearest editable property on the current preset
Keep the change modest. The goal is not to redesign the face. The goal is to create one believable visible delta.
Expected result:
- the face preview updates immediately
- the change is clearly tied to the element and property you selected
- you can reverse or soften the change by returning the value closer to its starting point
4. Notice what this first customization step teaches
You just crossed a meaningful boundary:
- in
Experience, you drove a prebuilt face from a tutorial runtime - here, you changed the authored state of an existing face in the authoring surface itself
That is why this page counts as customization even though you did not import a new asset or build a new rig.
5. Connect the edit back to the owning app
Open these implementation anchors after you make the visible change:
vizij-web/apps/vizij-authoring/README.mdvizij-web/apps/vizij-authoring/src/App.tsxvizij-web/apps/vizij-authoring/src/components/app/Viewer.tsx
What to notice:
- the app is built on the same runtime-truthful Vizij stack used by downstream consumers
- preset loading is a first-class entry path, not a shortcut bolted on later
- the viewer and inspector surfaces are there so you can validate an edit immediately against the live face
What This First Win Does Not Require
You did not need to:
- import a raw asset from disk
- create a new rig contract
- load a reference face
- author a full pose library
- export a new bundle
Those are real parts of Customize, but they come after the first believable edit.
Choose Your Next Authoring Step
Once the first tweak works, pick the next page by intent:
| If your next goal is… | Open this next |
|---|---|
| bring your own asset or authored metadata into the tool | Import |
| understand or repair the controllable structure first | Rigging |
| define reusable expression states | Poses |
| author timed motion | Animations |
| author reactive behavior from live inputs | Procedural Programs |
Fast Recovery If It Fails
Use these shortcuts:
- if the app stays on
Empty Scene, reload the preset and wait for the panels to populate - if the face loads but the inspector is blank, reselect a scene element from
Face Elements - if the property you picked is locked or not visually obvious, choose a different unlocked mouth or facial morph target
- if the runtime itself looks unhealthy, use Validation Checkpoints or Troubleshooting Matrix
Recommended Next Steps
If you want to understand what can safely come into authoring, continue to Import.
If you want to understand how Vizij represents editable face structure more deeply, continue to Rigging or Poses.